
Today, I am taking a look at encryption in my homelab. In today's digital world, security should matter to everyone. Especially in a homelab, where various services and IoT devices interact, it is essential to protect sensitive data from prying eyes. In this article, I would like to share my experiences and strategies for creating a secure and trustworthy environment in my homelab by implementing SSL certificates and my own PKI (Public Key Infrastructure).
This article is less about how encryption works technically. It is about issuing certificates, which is a prerequisite for some applications to encrypt data at all. It is about the foundation of trust in your network.
Starting out with XCA
I have always thought that creating a root CA (Certificate Authority) made sense. In the past, I did not place that much importance on it. But as the number of IoT devices (all the electronic things that communicate) at home grew, I eventually wanted to make sure that all network traffic (particularly between sensitive services and IoT devices) was encrypted.
Initially, I managed my root CA exclusively with the excellent tool XCA and created a sub-CA signed by the root. This allowed me to centralize certificate management and ensure that only trusted certificates were used in my network.
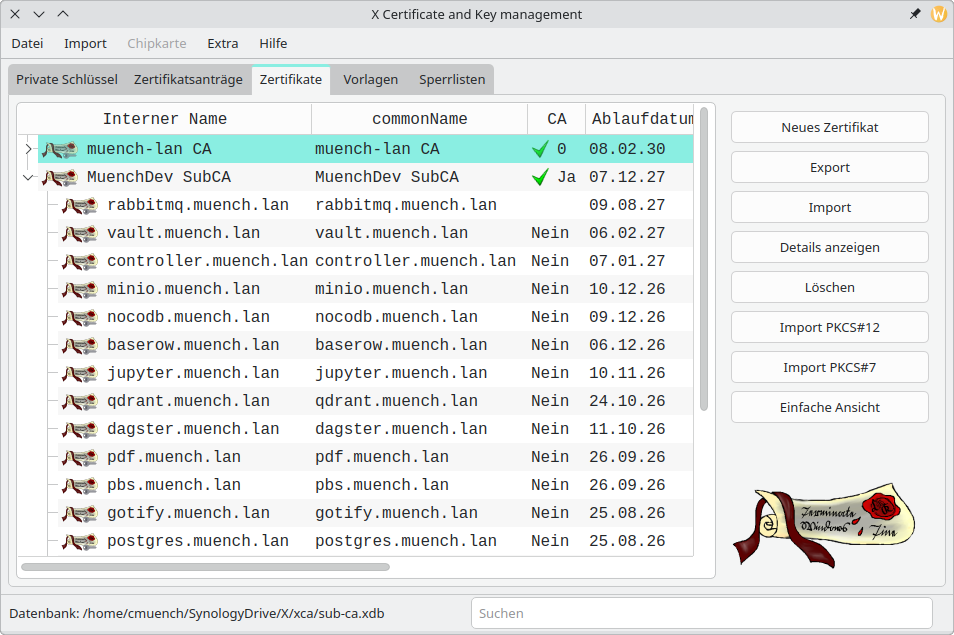
I still use XCA to store my root certificates securely. I also considered using Hashicorp Vault here.
LabCA (ACME)
Manually managing my certificates got on my nerves, so I integrated LabCA into my setup. With the help of step-ca to automate CA management, LabCA provides a user-friendly web interface that considerably simplifies management. One LabCA feature is the ability to automate certificate retrieval through ACME (Automatic Certificate Management Environment). This automatically updates certificates for Proxmox, web servers, and PostgreSQL servers, among others.
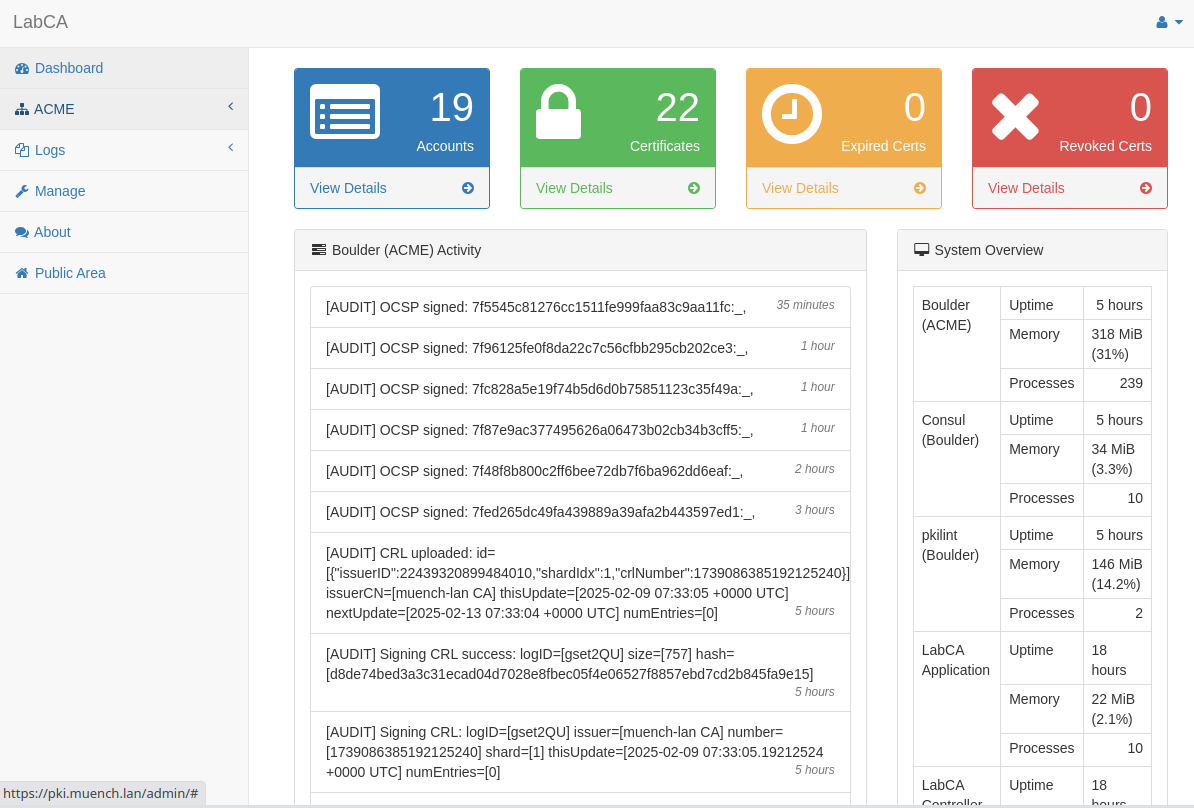
Another advantage of LabCA is monitoring certificate expiration dates. I receive an email when one of my certificates is about to expire. This gives me the assurance that I will notice any malfunction and that my services remain available without interruption to their users (my family and me).
Certbot and Nginx
In some of my setups, I used the Nginx server for SSL termination. In my new setup, however, I use Certbot to obtain certificates from my own PKI. These certificates are valid for 30 days by default, and Certbot takes care of renewing them in good time. By mounting the /etc/letsencrypt directory read-only into my Docker containers, I can seamlessly integrate the newly obtained certificates.
It is important to mount the entire /etc/letsencrypt directory so that the symlinks Certbot creates work too.
Here is the configuration of my NocoDB server as a complete example:
services:
  nginx:
    image: nginx:alpine
    restart: unless-stopped
    ports:
      - "443:443"
    volumes:
      - ./nginx.conf:/etc/nginx/nginx.conf

      # Hier ist das SSL Zertifkat vom Certbot einbefunden.
      - /etc/letsencrypt:/etc/letsencrypt:ro
    depends_on:
      - nocodb

  nocodb:
    container_name: nocodb
    image: nocodb/nocodb:0.258.10
    env_file: .env
    restart: always
    ports:
      - 80:8080
    volumes:
      - type: volume
        source: data
        target: /usr/app/data

volumes:
  data:
The Nginx configuration is kept very simple here:
events {}

http {
  server {
    listen 443 ssl;
    server_name nocodb.muench.lan;

    # Hier ist das SSL Zertifikat vom Certbot eingebunden
    ssl_certificate /etc/letsencrypt/live/nocodb.muench.lan/fullchain.pem;
    ssl_certificate_key /etc/letsencrypt/live/nocodb.muench.lan/privkey.pem;

    client_max_body_size 200M;

    location / {
      proxy_pass http://nocodb:8080;
      proxy_set_header Host $host;
      proxy_set_header X-Real-IP $remote_addr;
      proxy_set_header X-Forwarded-For $proxy_add_x_forwarded_for;
      proxy_set_header X-Forwarded-Proto $scheme;
    }
  }
}
To make sure everything runs smoothly, I used Certbot's pre_hook and post_hook to execute scripts that restart the relevant Docker containers. This automation saves me a lot of manual work and lets me focus on more important tasks in my homelab.
Advantages of the Caddy server
The Caddy server also comes into play regularly, particularly for new web server setups. Caddy supports ACME out of the box, which makes setting up and managing SSL certificates extremely easy. Without needing Certbot, I can save time while also taking care of the security of my applications.
Here is an example of the configuration of my pgadmin server:
{
    email christian@muench.dev
    acme_ca https://pki.muench.lan/directory
    acme_ca_root /usr/local/share/ca-certificates/muench-lan-root-ca.crt
}

pgadmin4.muench.lan {
    tls {
        ca_root /usr/local/share/ca-certificates/muench-lan-root-ca.crt
    }

    reverse_proxy pgadmin:80
}
Since Certbot is not involved here and the Caddy server handles this, only the root CA certificate needs to be mounted. Since I already had it in the LXC container, it was simply mounted into the container.
Encryption between hosts and containers
Although I could theoretically configure my Traefik server to use the internal PKI, I decided to avoid doing that for now. I do not want to route all internal traffic through Traefik, but instead ensure direct encryption between the individual servers and LXC containers. Each system therefore has its own certificates, which increases security in various ways.
In general, you have to make sure everywhere that connections within applications are also configured with SSL/TLS, etc.
Very often, however, this is not implemented in a particularly user-friendly way. Some applications also tend to ignore the root CA.
Where possible, though, you should try to set up connections to databases or other devices over encrypted channels.
Configuring the servers
For every server in my network to trust the new root CA, the root certificate needs to be added to the respective trust stores.
I run Linux on my Fedora workstation, and the Proxmox servers use Debian. The rest of my systems are LXC containers (on the Proxmox server) running Ubuntu.
I put the root CA certificate on a server that all servers can reach.
Users can conveniently download the root CA (without logging in).
Fedora
# Download Zertifikat (URL im Beispiel ist angepasst)
curl -O  https://example.com/acme/muench_lan_2025_root.crt

sudo cp muench_lan_2025_root.crt /etc/pki/ca-trust/source/anchors
sudo update-ca-trust
Debian
(in my case, the Proxmox servers, for example)
mkdir -p /usr/local/share/ca-certificates/extra
cd /usr/local/share/ca-certificates/extra

# Download Zertifikat (URL im Beispiel ist angepasst)
curl -O  https://example.com/acme/muench_lan_2025_root.crt

update-ca-certificates
Ubuntu
All my LXC containers are based on Ubuntu 24.04.
You can perform the configuration manually like this:
sudo -s
mkdir -p /usr/local/share/ca-certificates/extra
cd /usr/local/share/ca-certificates/extra

# Download Zertifikat (url im Beispiel angepasst)
curl -O  https://example.com/acme/muench_lan_2025_root.crt

sudo update-ca-certificates
For the servers, I automated installation of the root CA using Ansible.
It looks roughly like this:
---
- name: Install muench-dev root ca playbook
  hosts: all
  become: true
  gather_facts: true
  vars:
    is_ubuntu: ""
  tasks:
    - name: Install pki.muench.lan CA
      when: is_ubuntu
      block:
      - name: Download root-ca.pem
        ansible.builtin.get_url:
          url: https://example.com/acme/muench_lan_2025_root.crt
          dest: /usr/local/share/ca-certificates/muench-lan-root-ca.crt
          validate_certs: false
          mode: "0644"

        register: pki_muench_lan_ca_download

      - name: Update CA trust
        ansible.builtin.command: "update-ca-certificates"
        when: pki_muench_lan_ca_download.changed
Configuring applications
Proxmox itself
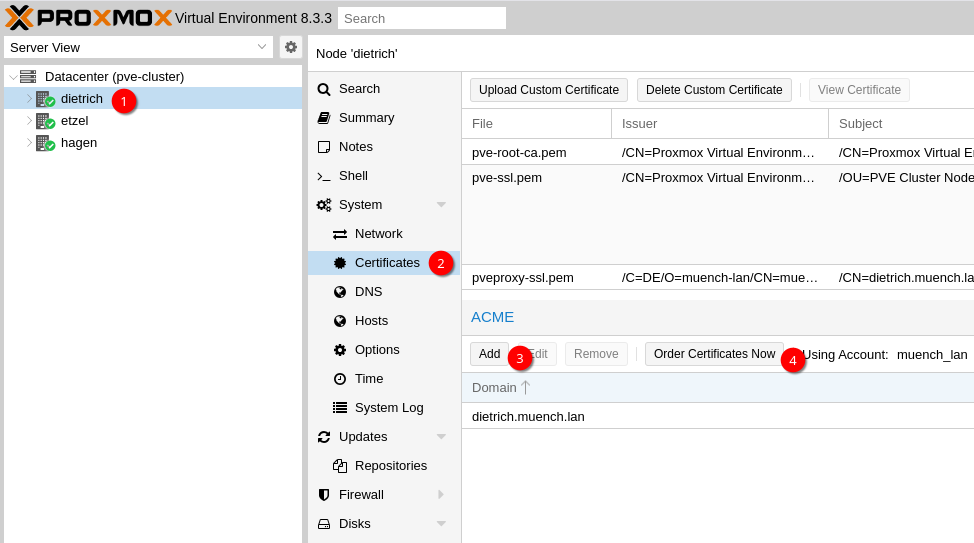
In Proxmox, I also registered my ACME server as an account so that Proxmox manages its certificates independently too. The ultimate goal is clear: I want to maximize automation and minimize intervention on my part.
Unfortunately, you cannot register your own ACME server directly through the Proxmox UI. It does work through the command line, though.
# PVE Node
pvenode acme account register muench_lan "christian@muench.dev" --directory https://pki.muench.lan/directory

# Für dem PBS
proxmox-backup-manager acme account register default "christian@muench.dev" --directory https://pki.muench.lan/directory
After that, you can very easily have Proxmox obtain the certificate.
Postgres server
In my Docker setup, I integrated the certificates/keys obtained by Certbot through the ssl_cert_file and ssl_key_file parameters.
services:
  postgres:
    container_name: postgres
    image: postgres:16
    ports:
      - 5432:5432
    command:
      - postgres

      # .... weitere Konfiguration

      - -c
      - ssl_cert_file=/certs/live/postgres.muench.lan/fullchain.pem

      - -c
      - ssl_key_file=/certs/live/postgres.muench.lan/privkey.pem
    restart: unless-stopped
    env_file:
      - postgres.env
    volumes:
      - postgres-data:/var/lib/postgresql/data
      - ./certs:/certs
Unfortunately, the permissions inside the container are not right: the Postgres user (inside the container) is not allowed to read the certificates.
For this reason, I added the following to my Certbot renewal configuration file /etc/letsencrypt/renewal/postgres.muench.lan.conf:
[renewalparams]
post_hook="/usr/local/bin/move-certificate.sh"
The script /usr/local/bin/move-certificate.sh then moves the certificates into the directory mounted in the Postgres container and sets the permissions for the Postgres user so that it can access them.
The database is then restarted (once every 30 days).
One problem I discovered was that Postgres does not resolve certificates from symlinks. That is why I had to have the symlinks resolved when copying the files.
#!/bin/bash

CERT_SRC=/etc/letsencrypt;
CERT_DEST=/srv/docker/postgres/certs;

# Resolve symlink -> Postgres cannot work with linked certs
cp -rL $CERT_SRC/* $CERT_DEST/;

# Postgres runs as user 1000 with group 100
chown -R 999 $CERT_DEST;

chmod -R 700 $CERT_DEST;


cd /srv/docker/postgres;
docker compose restart postgres;
Node-RED and n8n (Node-JS applications)
To make Node-RED use my root CA, I simply mounted the root CA .crt file previously installed through Ansible into the Docker container and told the NodeJS application to use that file through the environment variable NODE_EXTRA_CA_CERTS.
services:
  node-red:
    container_name: node-red
    # ... other configs

    # Node sagen, dass es die Root-CA aus der Datei nutzt
    environment:
      - NODE_EXTRA_CA_CERTS=/usr/local/share/ca-certificates/muench-lan-root-ca.crt
    volumes:
      - ./data:/data:rw

      # Zertifikat mounten
      - /usr/local/share/ca-certificates/muench-lan-root-ca.crt:/usr/local/share/ca-certificates/muench-lan-root-ca.crt:ro
For n8n, it looks almost exactly the same, because it is also a Node application.
The NODE_EXTRA_CA_CERTS variable can be set here too.
Testing is a must
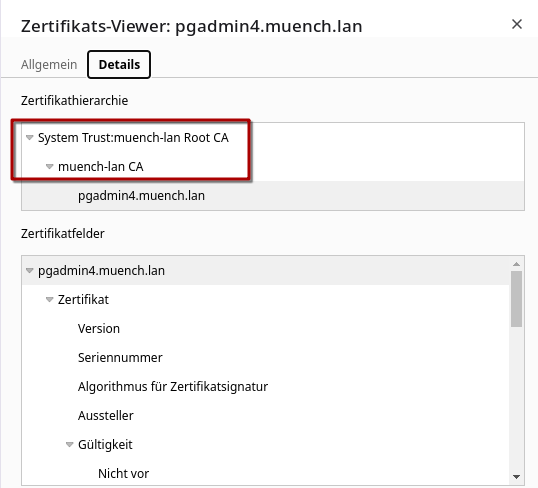
It is very easy to check in the browser whether the certificate is being used.
If everything is right, you should be able to see the whole chain from root CA -> sub-CA -> TLS certificate.
You can also quickly check whether a certificate is correct using OpenSSL.
For my Postgres server, I can do it like this:
echo "" | openssl s_client -starttls postgres -connect postgres.muench.lan:5432 -showcerts
This should display something like Verify return code: 0 (ok).
It is important to check the connections, since some applications do not display an error but instead fall back to an unencrypted connection.
Conclusion
In summary, implementing SSL and your own PKI in a homelab not only increases security but also makes everyday life considerably easier. By automating certificate management with tools such as LabCA and Certbot, and flexibly using modern server solutions, I have created an infrastructure that is both secure and user-friendly.
What you can see in my setup is that a homelab like this really is alive. It is always being reshaped. But that is precisely what makes it special. You can test lots of things and then perhaps use them in your professional life too.