
For a while now, I have been running a small Raspberry PI 4 that does not do very much. A small RTL USB stick connected to the USB port receives data from my weather station over the air. I also run a Drone runner on the device to test Arm64 software. Overall, the device is not really being used to capacity. I want to change that, but I am a little worried that the SD card everything runs on will quickly become corrupted, taking the data with it. So I decided to set up the Raspberry PI again and equip it with an SSD.
Hardware
For the Raspberry PI to boot from an SSD, it needs to be connected to a USB-3 port. I want to run my device in a server cabinet and would like everything in one compact unit.
For this, I bought the following things:
- Geekworm Raspberry Pi 4 mSATA SSD Adapter X857
- Geekworm Raspberry Pi 4 Model B X735 V2.0
- Geekworm Raspberry Pi X857 metal case
- Kingston SUV500MS/240G UV500 mSATA-SSD
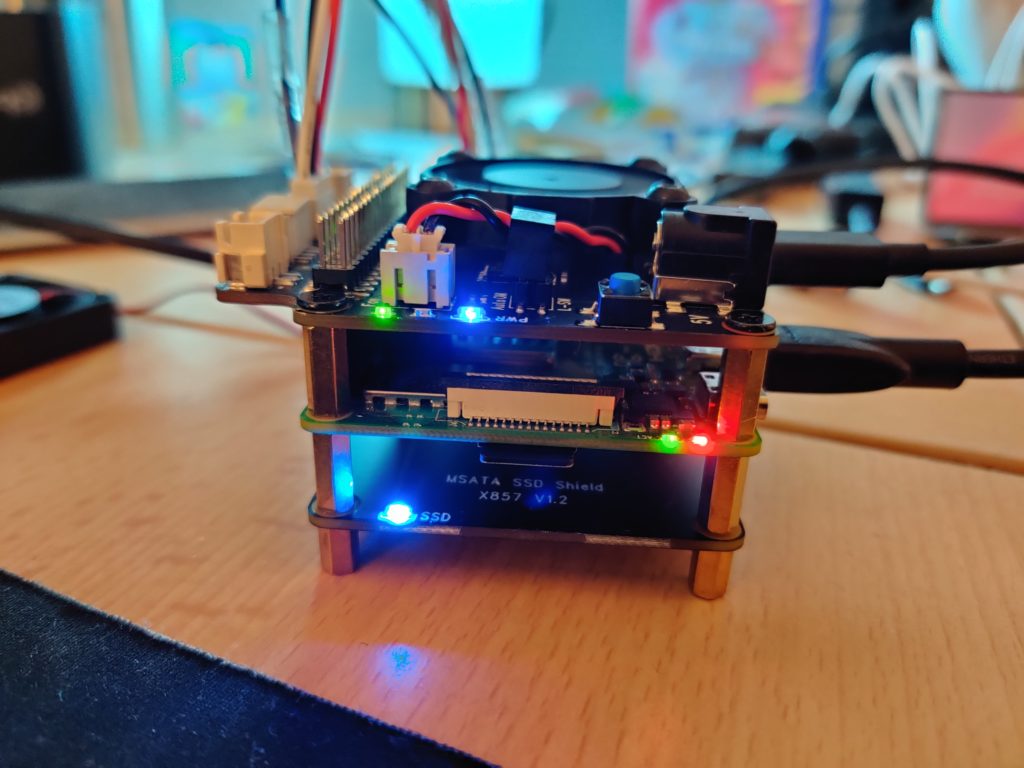

Before installing it in the case
The mSATA SSD is very flat and sits clamped and screwed in underneath the Pi. You cannot see it in the picture. But there is enough space underneath the SSD adapter.
The Raspberry Pi is in the middle.
At the top, you can see the X725 power management expansion. This is where power will later be supplied to run the Pi and two fans. The case's power button is also connected there.
The SSD is connected at the back via a small bridge across the USB ports.

Installed in the server cabinet
Installing the operating system
The starting point here is Raspberry Pi OS 64-bit so that I can use all 8 GB of RAM in my Pi. In my case, I downloaded the image from here: https://downloads.raspberrypi.org/raspios_arm64/images/raspios_arm64-2020-08-24/
First, you need to put the operating system on the SD card. I simply booted into the graphical interface. Initially, I had a reboot loop. This was caused by a power supply that was too weak. Normally, connecting the Pi to a monitor via HDMI should be enough. Of course, you need to get a suitable cable beforehand, since the Pi 4 only has a Mini-HDMI port.
The current 64-bit version already comes with USB boot support. Still, it is best to double-check the setting.
To be on the safe side, I also updated all packages to the latest version and rebooted once.
Checking the boot configuration


Copying data to the SSD
Once USB boot is enabled, the Pi can boot from the SSD, provided it is compatible.
First, though, the data needs to be transferred from the SD card to the SSD. Raspberry Pi OS already comes with a suitable program.
You can find it under "Accessories > SD Card Copier". Select the SD card as the source and the SSD as the destination, then start copying.

Once everything is finished, simply shut down the device and remove the SD card. The Pi should then boot from the USB SSD.
An "lsblk" should then look like this:
root@fafnir:/home/cmuench# lsblk
NAME   MAJ:MIN RM   SIZE RO TYPE MOUNTPOINT
sda      8:0    0 223,6G  0 disk
├─sda1   8:1    0   256M  0 part /boot
└─sda2   8:2    0 223,3G  0 part /
Have fun with your fast Pi.